How to Prepare for a Hospital Stay: The Complete Checklist
June 15, 2021

Why Preparation Makes All the Difference Before a Hospital Stay
A hospital admission — whether planned in advance or arriving unexpectedly — is one of life's most disorienting experiences. Even for generally healthy people, the unfamiliarity of medical environments, the loss of routine, and the anxiety of uncertainty take a significant toll. For people managing chronic conditions, complex medical histories, or multiple medications, the stakes are even higher: gaps in information communicated to healthcare providers can have serious consequences.
A 2019 study published in the BMJ Open Quality journal found that medication errors at hospital admission — often caused by incomplete medication histories — occur in up to 70 percent of patients. Many of these errors are entirely preventable with good preparation. Arriving at hospital with your medical information organised, your personal items packed thoughtfully, and your home prepared for recovery can reduce stress, reduce errors, and improve outcomes.
This guide covers everything you need to prepare for a planned hospital stay, and includes steps you can take now — before any admission is on the horizon — to ensure you are ready for the unexpected too.
Planned vs. Emergency Admissions: Different Preparation, Same Priority
If you have a planned surgical procedure or elective admission, you may have days or weeks to prepare. This is a significant advantage — use it. Follow the pre-admission instructions provided by your hospital carefully, and use the additional time to organise your medical information, prepare your home for recovery, arrange support from family or friends, and ensure your affairs are in order.
For emergency admissions, preparation necessarily happens in advance — you cannot anticipate the timing. The best approach is to maintain a current medical summary at home and, where possible, wear a medical ID that communicates your essential health information immediately. This allows hospital staff to act on accurate information from the first moment of contact.
Building Your Medical Information File
Every person — regardless of age or health status — benefits from maintaining a personal medical information file. This should include: a list of all current medications (name, dose, frequency, and purpose); a record of known allergies and adverse reactions; key diagnoses and the names of treating specialists; recent test results (particularly if you have ongoing conditions requiring monitoring); and the contact details of your primary care doctor and relevant specialists.
Bring this file to your hospital admission. Not only does it reduce the risk of medication errors, it also speeds up the admissions process, helps nursing and medical staff understand your full health picture quickly, and ensures you can answer clinical questions accurately even if you are unwell or anxious.
What to Pack: The Complete Hospital Bag Checklist
Packing the right items makes a genuine difference to comfort and recovery during a hospital stay. Here is a comprehensive checklist organised by category.
Medical and Administrative Essentials
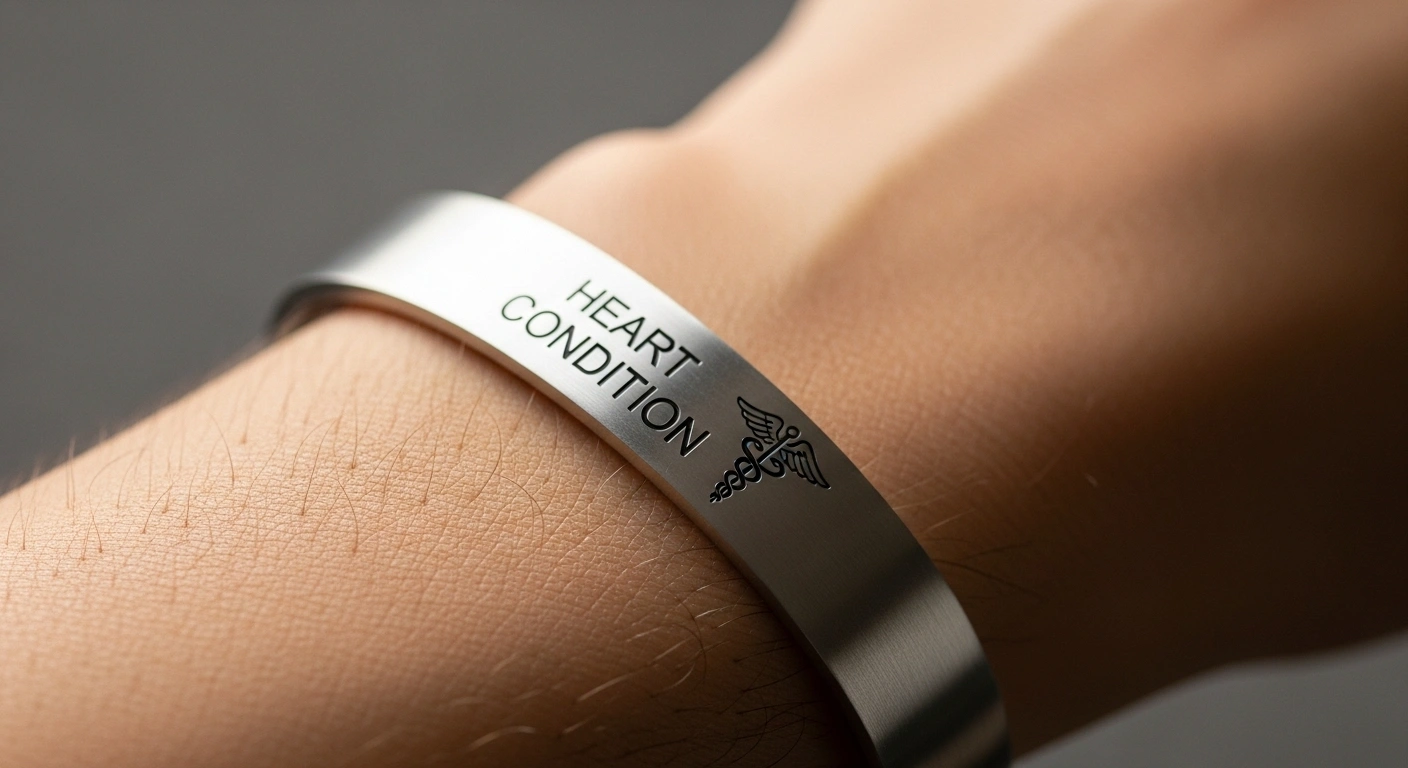
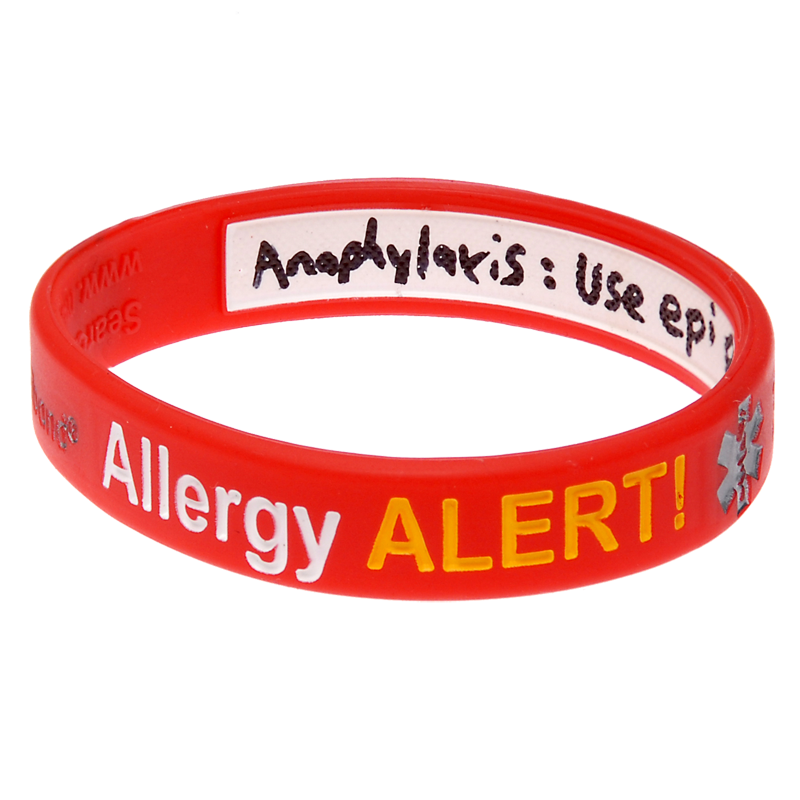
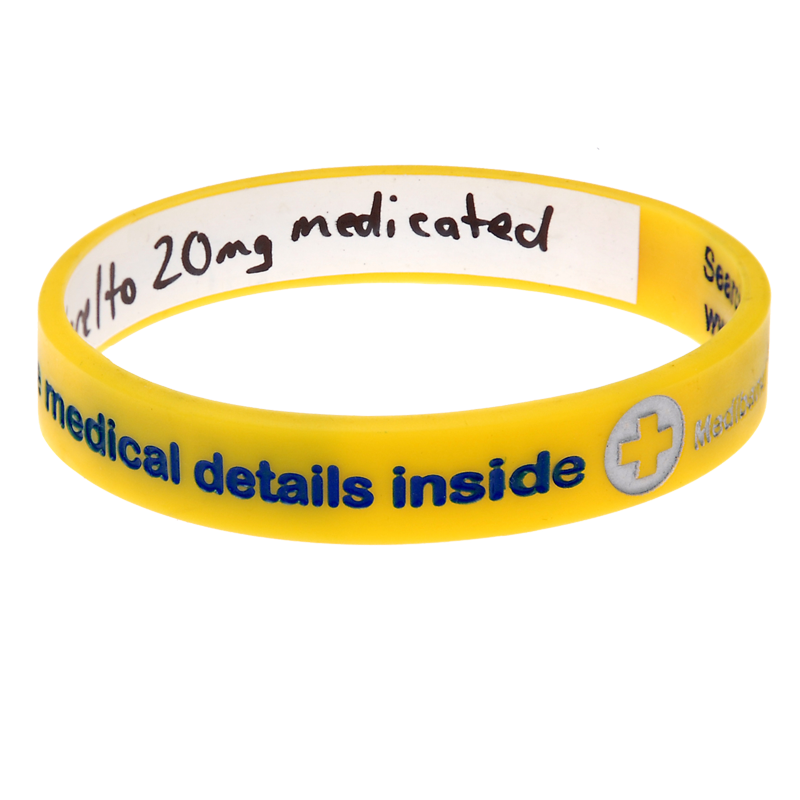
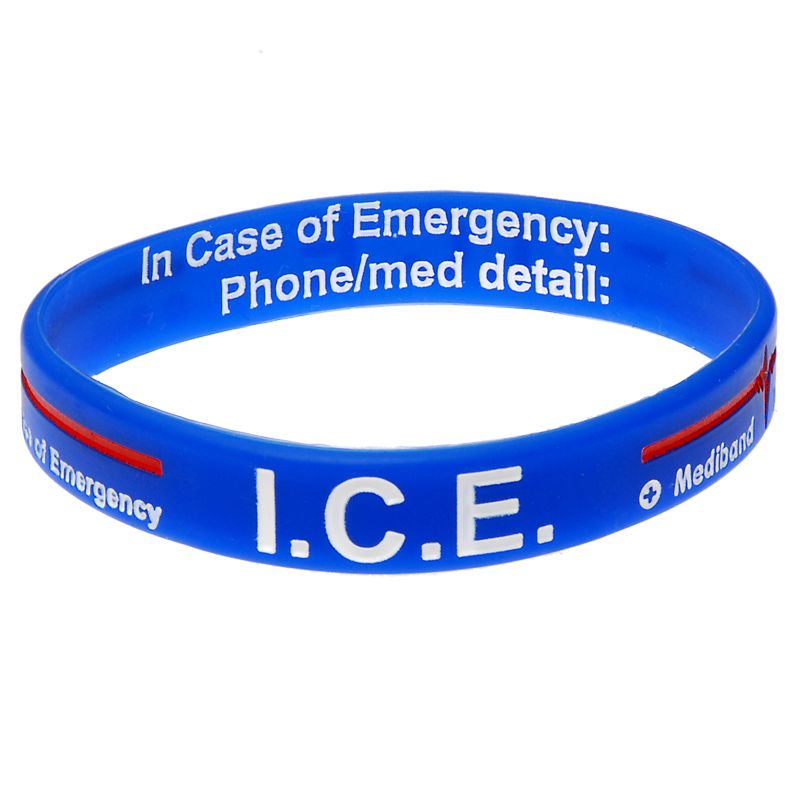
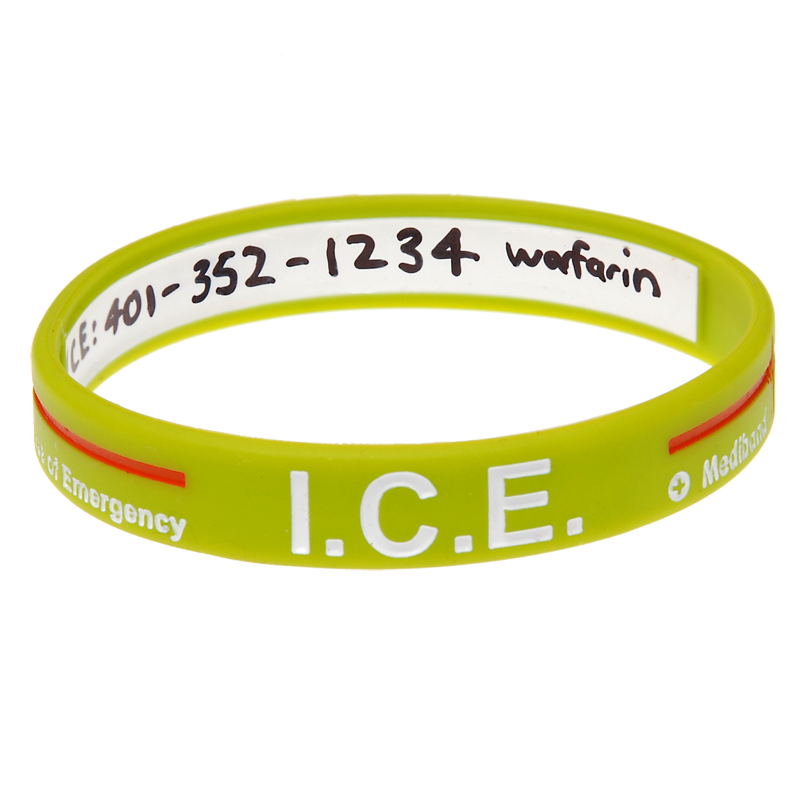
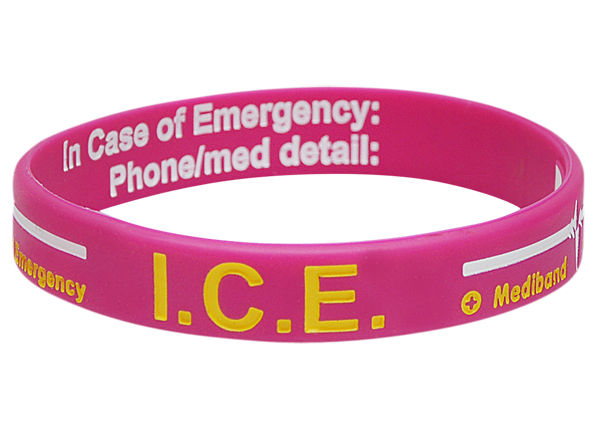
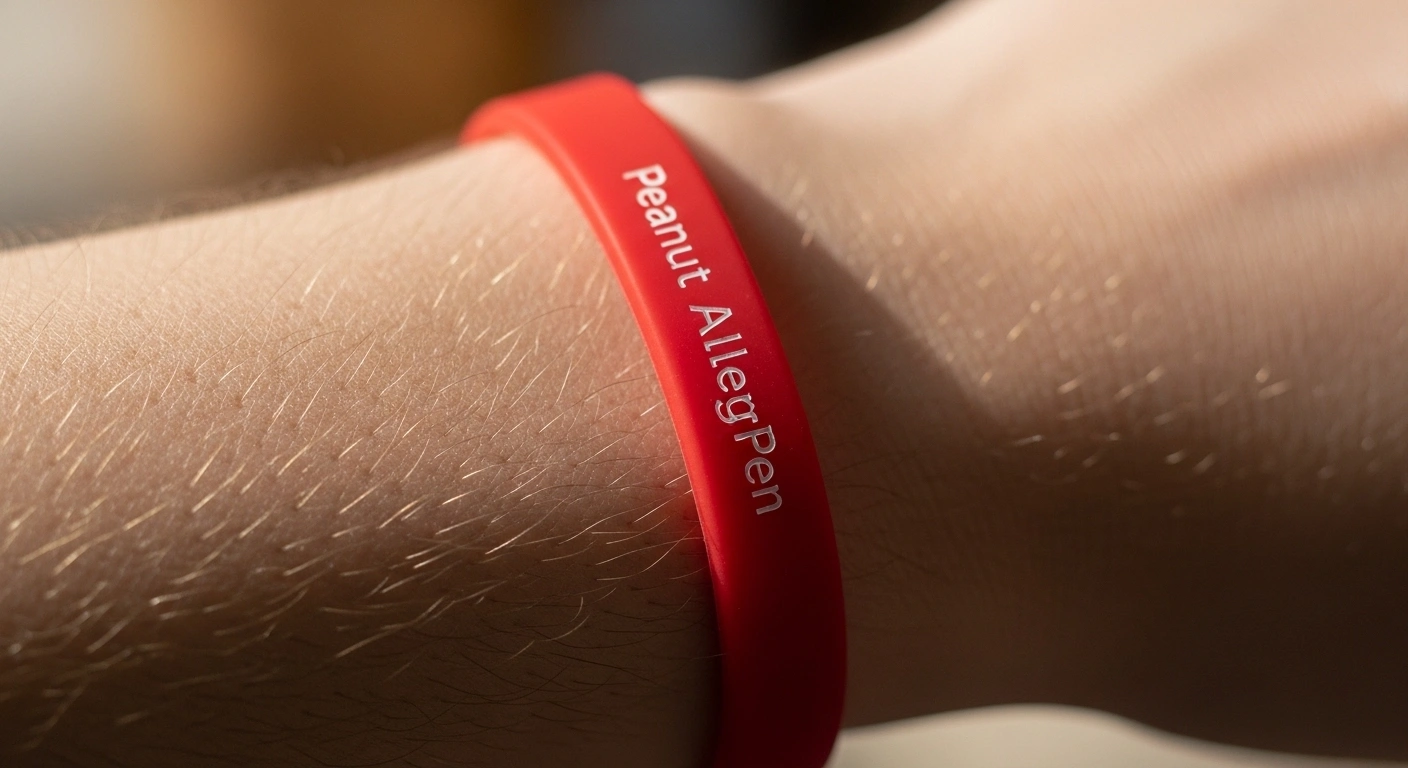
These are the most important items — do not leave home without them. Your completed medical information file (medications, allergies, diagnoses, specialist contacts). Any required pre-admission forms or consent documents. Your health insurance card and any pre-authorisation documents. A government-issued photo ID. Your medical alert bracelet — keep it on your wrist throughout your stay; it communicates critical information at a glance, particularly if you are sedated, unconscious, or confused post-procedure. Any specialist equipment you use regularly, such as a CPAP machine, hearing aids, or mobility aids.
Personal Comfort Items
Hospital environments prioritise clinical function over comfort — bringing your own items significantly improves the experience. Non-slip socks or lightweight slippers (a falls risk concern, particularly post-surgery). Comfortable, loose-fitting clothing suitable for dressing and undressing easily around monitoring equipment. A lightweight dressing gown or robe. Personal toiletries in travel-size containers (toothbrush, toothpaste, moisturiser, dry shampoo). A phone charger with a long cable (hospital power outlets are never conveniently placed). Headphones and a tablet or e-reader loaded with content for periods of waiting and recovery.
Medical IDs for Hospital Stays and Emergencies
Arrive prepared. Let your bracelet speak for you when it matters most.

Managing Medications During a Hospital Stay
Medication management is one of the highest-risk aspects of any hospital stay, and one where patient preparation makes the biggest difference. Bring a complete, up-to-date medication list in written form — do not rely on pharmacy printouts alone, as these may not include medications prescribed by multiple providers or over-the-counter supplements that interact with prescription drugs.
Inform every member of your care team — doctors, nurses, and anaesthetists — about all medications you take, including herbal supplements, vitamins, and over-the-counter products. Many supplements interact with anaesthesia, blood thinners, and other medications commonly used in hospital settings.
Understand the hospital's policy on self-administering medications. In many cases, patients are required to hand over their own medications to be dispensed by nursing staff according to the prescribed schedule. If you have complex medication needs or concerns, discuss these with the admissions team in advance.
For people wearing a medical alert bracelet that lists medications or critical medical conditions, ensure this information is accurate before admission — and wear the bracelet throughout your stay. Even in a hospital environment, a bracelet ensures that any clinician who interacts with you can see your essential information immediately, without relying on notes being passed between shift changes.
Preparing Your Home for Recovery After Discharge
Recovery at home is a critical phase that is often underestimated during the pre-admission period. The days immediately after discharge, when you are still managing pain, fatigue, or reduced mobility, are when having a well-prepared home makes the most difference.
Practical preparation steps include: ensuring your bed is accessible and comfortable for recovery; stocking the refrigerator and freezer with easy-to-prepare meals; ensuring essential items are within easy reach without excessive bending or stretching; removing trip hazards (particularly important after orthopaedic procedures); arranging for someone to be available for the first 24 to 48 hours after discharge; and filling any post-discharge prescriptions in advance if possible.
If you anticipate needing mobility aids — crutches, a walking frame, or a wheelchair — arrange for these to be available at home before admission. Occupational therapists and physiotherapists at the hospital can provide guidance on home modifications needed for your specific procedure and recovery; request this early rather than waiting until the day before discharge.
Communicating with Your Healthcare Team Effectively
Effective communication with hospital staff is both a right and a responsibility. You are always entitled to ask questions, request explanations of proposed treatments, and seek clarification on anything you do not understand. This is not being difficult — it is being an engaged participant in your own care, which consistently leads to better outcomes.
Practical communication strategies: bring a trusted person with you to key conversations (they will remember things you may miss when anxious); write down questions before ward rounds so you don't forget them; ask for written information as well as verbal explanations for procedures, discharge instructions, and medication changes; and don't hesitate to ask a nurse to page a doctor if you have an urgent concern between rounds.
For more information on managing a medical condition and staying prepared at all times, visit our guide to write-on medical ID bracelets that let you list conditions, medications and emergency contacts in one place. Or explore the complete Mediband medical ID range for options that suit your lifestyle.
What Every Person Should Have Before Any Hospital Visit
Some preparation steps are valuable not just for planned admissions but as ongoing habits that protect you in any healthcare encounter — planned or emergency. These are the baseline safety measures that every person, particularly those with chronic conditions, should have in place.
Maintain an up-to-date medication list, stored somewhere accessible. Ensure at least one person in your household knows your medical history and can communicate it on your behalf if you are unable to do so. Keep your GP's contact details saved. And wear a medical alert bracelet if you have any condition — allergy, cardiac condition, diabetes, epilepsy, or anything else — that is relevant to emergency treatment decisions.
A medical ID bracelet works when you cannot. It communicates your critical health information to emergency responders, admitting nurses, and any clinician who interacts with you when you are sedated, in pain, or otherwise unable to speak for yourself. It is the single most reliable piece of medical identification available, precisely because it is worn on the body and immediately visible. Browse Mediband's full range of medical ID options including engraved, write-on, and designer styles to find the right fit for your needs.
Frequently Asked Questions
How far in advance should I prepare for a planned hospital stay?
Ideally, begin preparation as soon as your admission date is confirmed — even if that is weeks away. Use early preparation time to gather and organise your medical information, arrange home support for post-discharge recovery, and stock your home with essentials. Leave personal packing and medication preparation for the final 48 hours, when your medical team has confirmed any pre-procedure requirements such as fasting or medication adjustments.
What should I put on my medical alert bracelet for a hospital stay?
For a hospital stay, your medical alert bracelet should include your primary medical conditions, critical allergies (particularly drug allergies — these are among the most important pieces of information for hospital staff), and at least one emergency contact number. If you take blood thinners, have a pacemaker, or have any other condition that significantly affects treatment decisions, ensure these are listed. A reversible write-on bracelet allows you to include medication names alongside your diagnosis.
Can I keep wearing my medical alert bracelet during surgery?
Discuss this with your surgical and anaesthetic team before your procedure. In many cases, metal bracelets must be removed for MRI or procedures using electrosurgical equipment. However, silicone or plastic bracelets are often permitted during surgery, and some facilities apply tape over the bracelet rather than removing it. Even if removed for the procedure itself, keep the bracelet on your bedside table so it can be put back on in recovery.
What documents should I bring to hospital?
Bring: a complete written medication list (including doses and frequencies); a list of known allergies and past adverse reactions; details of your current diagnoses and treating specialists; your health insurance information; photo identification; any pre-admission forms provided by the hospital; and a completed advanced care directive if you have one. If you have a complex medical history, a concise one-page medical summary is invaluable.
How can I make my home ready for recovery after a hospital stay?
The key areas to address are: access (ensure pathways are clear and essential items are within reach without bending or stretching); meals (stock the freezer with pre-prepared meals or arrange meal delivery); support (confirm who will be available in the first 48 hours); medications (fill post-discharge prescriptions before admission if possible); and comfort (ensure your sleeping area is comfortable and accessible). If mobility will be significantly impaired, ask the hospital's occupational therapist for a home assessment before discharge.

Share on Facebook

Share on X

Share on Pinterest
Comment(s)
Recent Posts
The Risk Of Not Wearing An Allergy Medical Alert Bracelet
March 23, 2026